
Having two girls, I haven't had the chance to create a fun party theme for boys. One of my favorites is planes, trains and automobiles. Below are some creative ideas, great deals and DIY inspiration. Happy Planning!

|
|
|
Having two girls, I haven't had the chance to create a fun party theme for boys. One of my favorites is planes, trains and automobiles. Below are some creative ideas, great deals and DIY inspiration. Happy Planning!
0 Comments
When you're throwing a party with young ones it's always a good idea to have some fun activities to keep them occupied. Here are a few of my favorite party games!  For little Sadie's 1st birthday her mom, Kim, threw her an adorable luau! Set up at a park to keep the little ones occupied, she also had tons of games set up in a grass area draped off by beautiful white cloth, roped to the trees for shade. 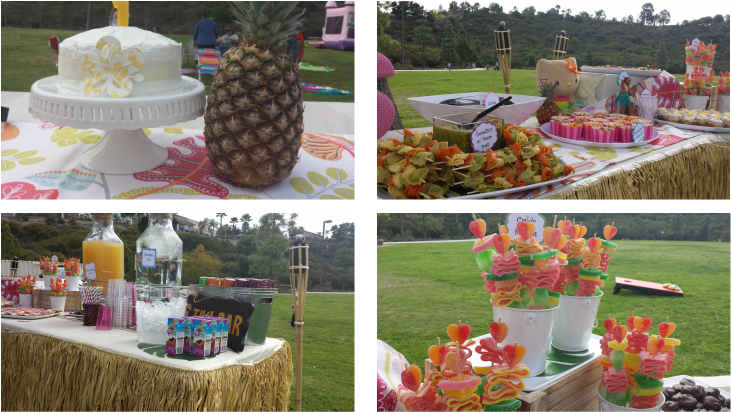 From left to right: Kim made Sadie's yummy smash cake, adding a Hawaiian flower and a beautiful white dessert stand, similar to this one from The Party Depot $37. Keeping with the luau theme, Kim used tiki torches throughout the party and a grass skirting around the table, similar to this one from Amazon $12. All of the food and drink tags were created using her Cricut machine. If you don't have one of these, a great DIY version could be easily done using Microsoft Word. All of the delicious food was made by her and placed on different sized dishes from Ikea. She found this cute idea of candy kabobs off of Pinterest, like this one from Catch my Party. She added a lot of sugar to small white buckets ($1 from Target) and stuck them in to be easily grabbed by little hands. 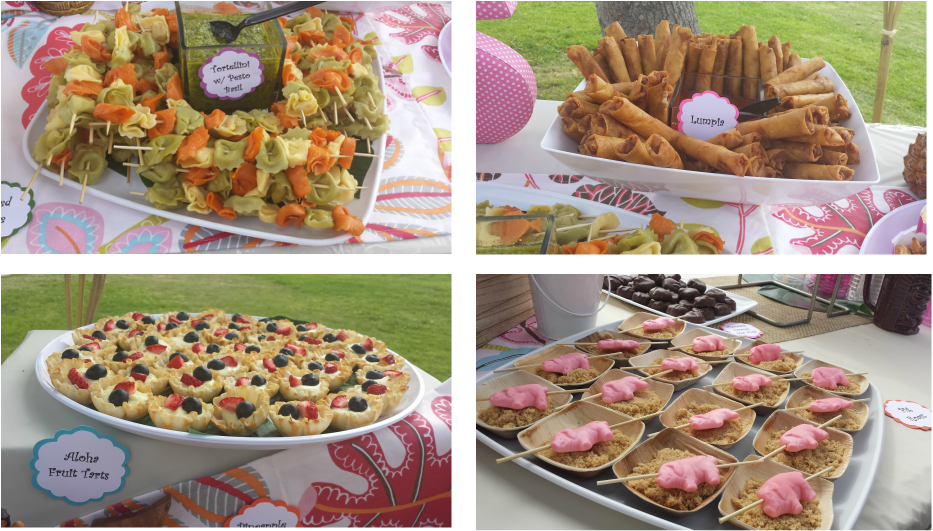 I love the idea of tortellini kabobs! Kim put cold tortellini on kabob sticks and added a cute serving dish with pesto for dipping. The cute roasting pigs idea (pig gummies on brown sugar) she found on Pinterest, similar to this one from Kara's Party Ideas. Not shown are the adorable games she had for the kids. She set up an area for an art project, a mini bean bag toss into colorful buckets and a hula hoop area for the kids to practice their moves! This was an adorable party and I hope it gives you some inspiration for your next luau!  This is one of the easiest party foods and definitely one of the most delicious! What you'll need: (makes 10-12 tacos) 1 lb. Cooked chicken - cut in strips or cubed 1 cup BBQ Sauce 1-2 cups Shredded cheese 16 oz can black or refried beans 10-12 Hard taco shells (with flat bottoms to stand alone) Any topping you want! Lettuce, tomato, sour cream, salsa, guacamole... Preheat oven to 400 degrees Place taco shells in a foil lined 9x13 baking dish (standing up). Mix BBQ Sauce with chicken in a large bowl. Spoon chicken mixture into each taco, top with beans and shredded cheese. Bake in oven for 10-12 minutes or until cheese is melted. Let your guests grab one, fill it with toppings and enjoy! 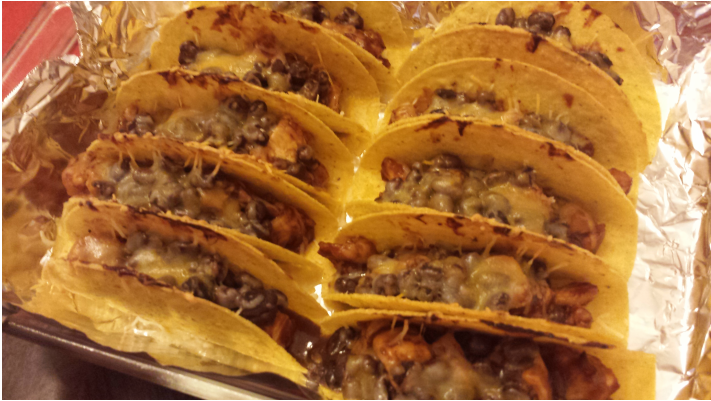 A super cute and easy table idea is to write the name of the dishes right on butcher paper! For the Taco Bar I used red paper, put my dishes where I wanted them and wrote what they were right there with black marker! So easy and people loved it! I hope this gave you some ideas for your next get together! 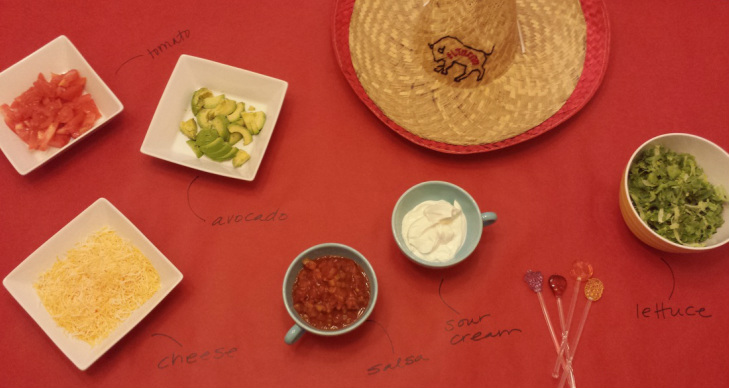  I have wrapped many, many packages in my life and I've encountered more than my share of bad paper. You know the type, thin, easily rips (especially as you cut that straight line the length of the paper). I have finally found a great wrapping paper and I'm so excited to share it with you! 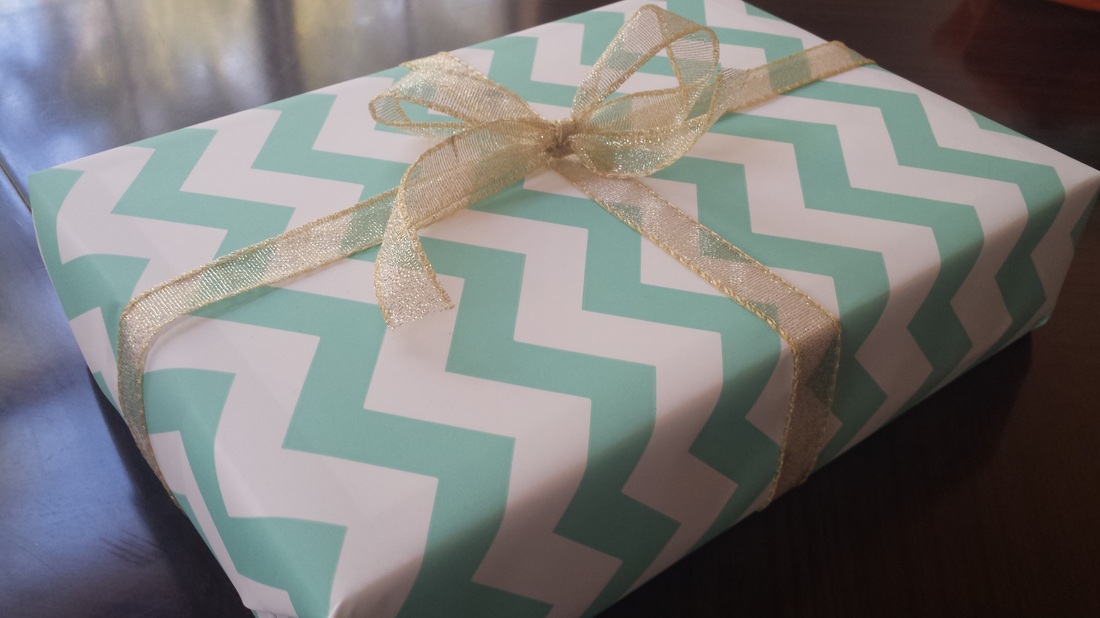 This Chevron patterned paper is from Target. It has a unique consistency that truly cuts "as smooth as butter". It is by far the easiest wrapping paper to cut and fold and a huge bonus if you love Chevron as much as I do! This gift I topped off with a shimmering gold ribbon (similar to this one off amazon) and voila, a beautifully wrapped gift for any type of party!  For my youngest daughter, Brooklyn's, 1st birthday I decided to go with an Alice in Wonderland theme. There were so many fun ideas that I went hog wild planning! I bought a few things (mostly off of my favorite site, Etsy), but I also did a lot of DIY projects to save money. First things first, I had to decide on an invitation. After seeing that going the usual route of buying pre-printed invites was very expensive, I bought an Etsy jpg that I was able to customize for only $10. PartyInvitesAndMore was awesome and allowed me to make several edits before finally sending me the final product. After I received it in my email inbox I had them printed at a local shop for just a few bucks! Next was the decor. This was where I really had fun! There were so many ideas that my only regret is I couldn't use them all! 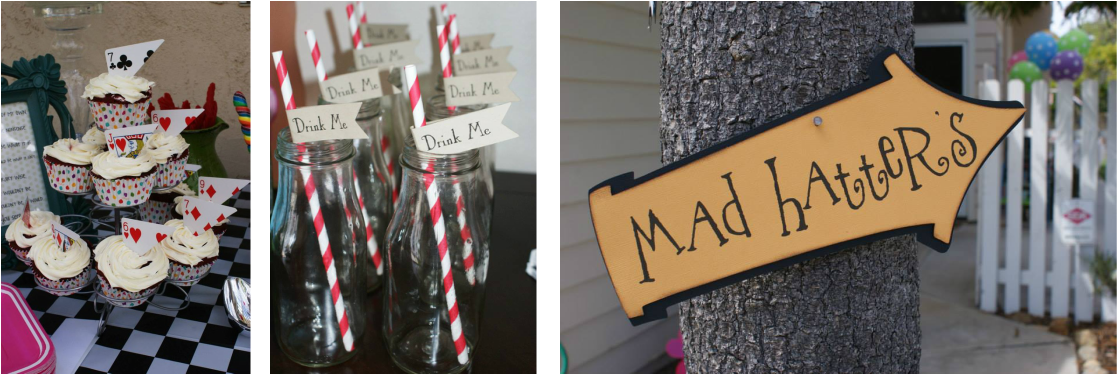 From left to right: I wanted to add an Alice feel to the plain old cupcakes so I bought a pack of playing cards at the dollar store (washed the ones I was going to use) and cut them into triangles for a topping! To add a whimsical feel to the drink table, I bought these fun red and white striped straws off of Etsy from angieheartsjared, 25 straws for $18. For the glasses, I just took Starbucks Frappuccino bottles and used goo gone to remove the labels. It took me only minutes and was much cheaper than buying those cute milk glasses online, and I just HAD to have the adorable Alice signs that send you in all different directions! Again, I went to Etsy and found a set of 5 signs that I could customize for only $18.50! I was able to pick which fun sayings I wanted as well as the colors. Kute Kardz was wonderful and they shipped them to me super fast, they were even cuter than I expected! I pinned them to a tree in my front yard and it was the first thing our guests saw! 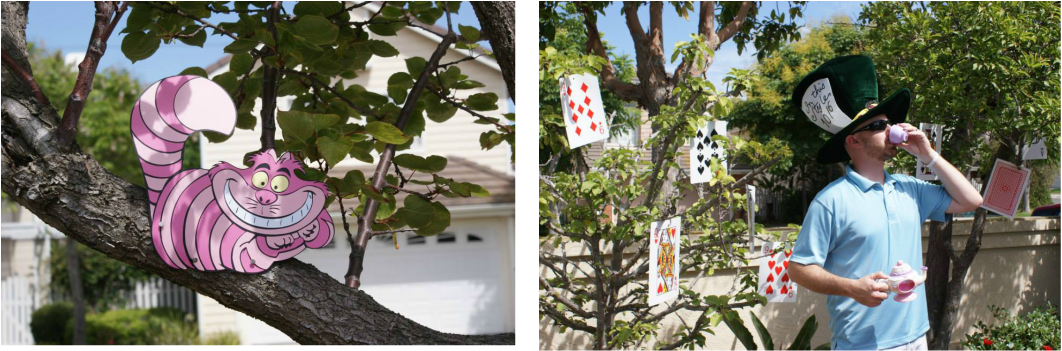 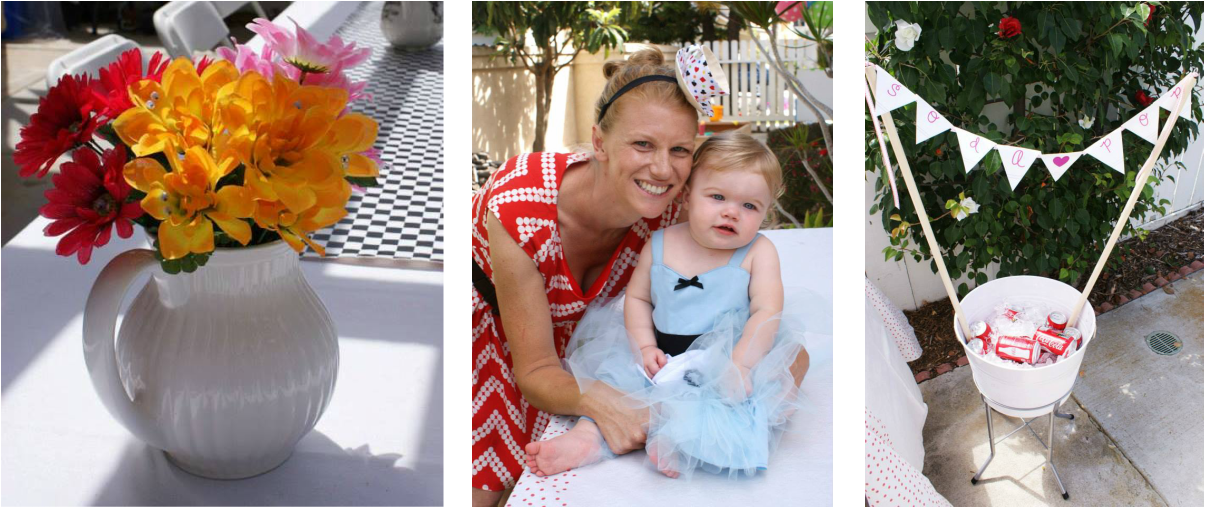 From left to right: This adorable chesire cat cut out was an Etsy find from Snows Cottage. It was only $3.75 and was amazing quality! I pinned it to a tree in our backyard and all the kids loved it! In addition, I also bought the white rabbit and put him inside my house near the door. I made a big black hole out of construction paper and glued him in front of it to make it look like he was going down the tunnel. I'm bummed I don't have a photo of it but you can imagine! Next is a picture of my goofy husband in a huge Mad Hatters top hat. I purchased this from Amazon, slightly expensive at $25 but the quality was better than I'd seen anywhere else and I figured he could use it for Halloween right!? The large playing cards in the tree were a really easy project, I just bought a large deck from Amazon for $17 (cheapest I could find for that size), punched holes in the top and tied them to the branches with fishing wire. Over the course of the few months before Brooklyn's birthday, I started collecting oversized teacups and pitchers whenever I'd see one. The white one above was from Marshalls and was only a few dollars. I bought a ton of fake flowers from the dollar store (so many that I actually walked out of there spending a lot!). I bought a packet ofgoogly stick-on eyes and added a pair to every flower to resemble the talking flowers in the garden scene. It was time consuming but turned out really cute! The middle photo is of me and my baby girl! Her Alice dress was a splurge handmade by Lover Dovers Clothing on Etsy $55. It was expensive but it turned out just gorgeous! My tea cup hat was made by Miwary on Etsy and I was able to customize the pattern. The soda pop sign was a fun project! I bought two round wooden dowels from home depot and two eye hooks - I attached the eye hooks to the top of the dowels so I'd be able to string through my DIY banner. Depending on the height you want, there are different sizes of both dowels and eye hooks available. For my sign I just made the letters in good old Microsoft Word and cut them into triangles, I folded down the very top of each letter and glued it onto the ribbon, leaving a little extra ribbon to fall down the sides. 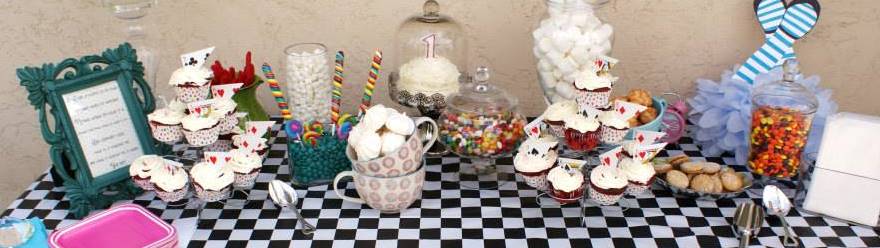 Ahh the Dessert Table! Quite possibly the best part of any party no? Since desserts play such a large role in Alice in Wonderland I wanted to make sure Brooklyn's party included a ton! First, a quote in a funky frame was needed. I found this frame at Marshalls for super cheap and printed a quote from the movie on polka dot paper in a cool font. "If I had a world of my own, everything would be nonsense. Nothing would be what it is, because everything would be what it isn't. And contrary wise, what is, wouldn't be and what it wouldn't be, it would. You see?" I found a really cool picture of Alice's legs upside down in a blue tutu that I decided to try myself! For this, I drew the shape of two legs on sturdy whte cardboard, making sure I followed the curve of where her shoes would be drawn. I colored in blue stripes with a thick pen and her shoes in black. Then I glued the two together so they'd look crossed. I purchased a blue pom from Pom Tree on Etsy ($4) and glued her legs to the top so it would look like she was upside down falling into the hole! I bought A LOT of candy and filled different sized tea cups, tea pots, and glass vases. The polka dot table cloth was from Amazon and was only $5. I had so much fun planning this party and our guests had so many compliments on the whimsical feel! Additional touches I included were overly large flowers in my garden, sandwiches cut into playing card suits, and all different sizes and colors of hanging lanterns! I hope you enjoyed looking at this fun party and I hope it gave you some ideas!  I have two amazing sister-in-laws, Erin and Chelsea. When Chelsea got engaged, Erin and I threw her and her fiance an engagement party! The theme was Rustic Chic and we had a lot of fun with our Pinterest board. I fell in love with the idea of a S'Mores Bar! Below is how it came to be. 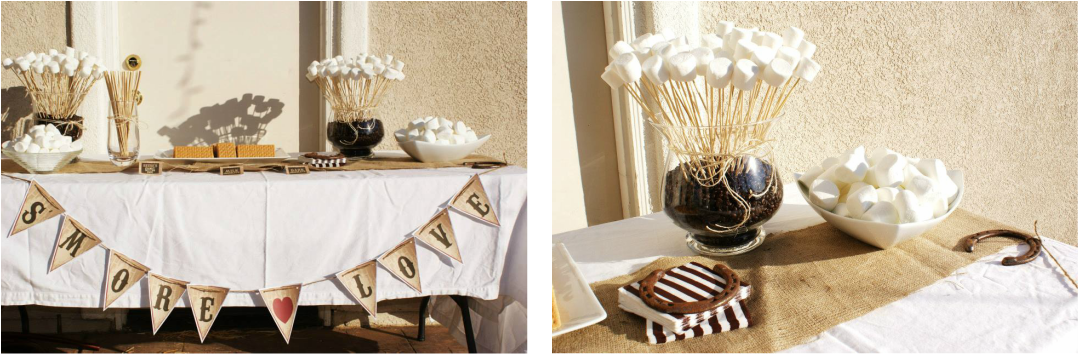 I bought a TON of marshmellows, some small and some jumbo, to give our guests a choice. I filled two large vases with coffee beans (which smelled delicious!) and then added the marshmellows stuck onto wooden skewers. I tied twine onto the vases to match the theme. Extra skewers went in a slender, tall vase and the extra marshmellows I placed in two of my white servng dishes from Crate and Barrel. I love the unusual shape of them as opposed to plain ol' round.. Erin purchased the fun navy blue striped napkins, simillar to these from TomKat Studio, and had the cool horseshoes we used to keep them from blowing away in the wind! She also bought a burlap table runner. The beautiful s'mores banner was designed by Nicole, Erin's sister-in-law on her husbands side. She did an amazing job on all of the signs, tying them into the rustic theme. You could do this yourself similar to what I did with the "soda pop" sign for my daughters Alice in Wonderland party (see previous post). 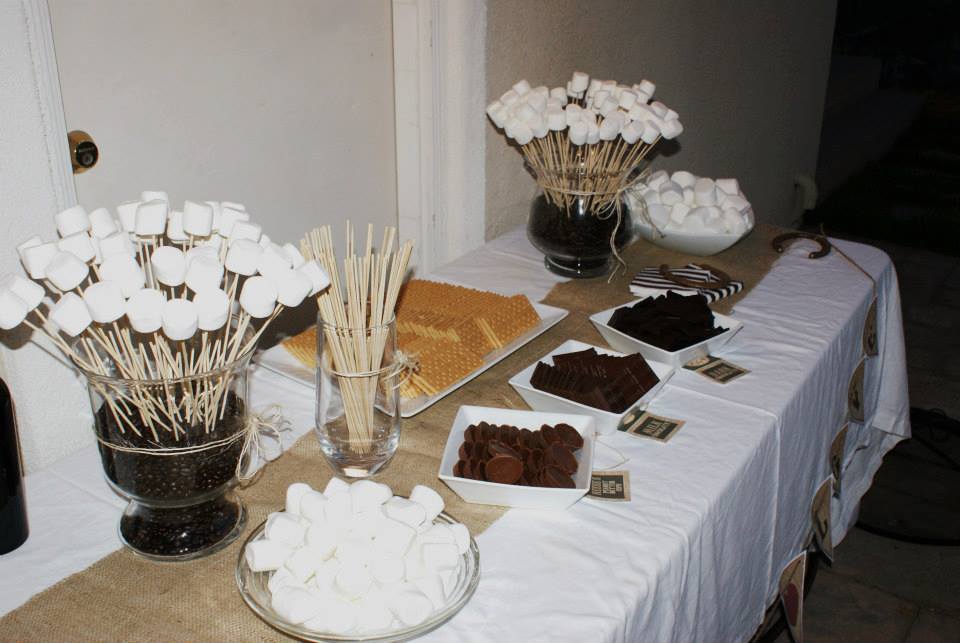 We waited until it was cooler to put out the chocolate. Nicole made the cards announcing each type of chocolate; dark, milk, and (my favorite) peanut butter cups! I bought the chocolate in big bars and then broke them up into squares. The peanut butter cups I bought in King Size and then unwrapped them individually. I put those in square white serving dishes, also from Crate and Barrel. The graham crackers I bought in bulk and purchased the generic brand in order to save some $ (they taste just as good right!?). 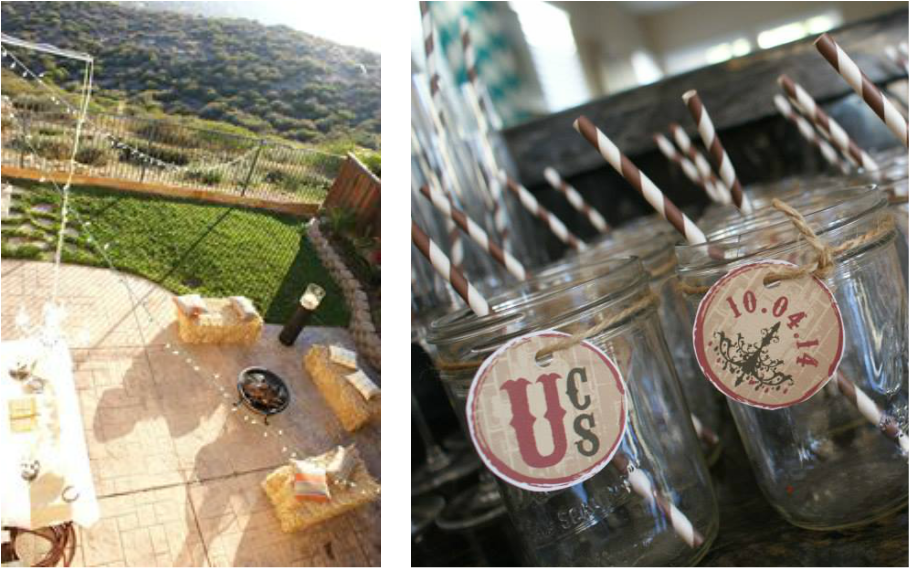 From left to right: This is an awesome aerial view of the backyard. Erin had a fire pit (essential for s'mores!) in the center of a few hay stacks and she threw a few pillows on each. She strung white lights across her balcony and placed candles on all the tables. Once night fell it was very romantic! Nicole made the cute labels for the mason jar glasses and attached them with the same twine I used on the S'Mores Table. These could easily be done in Microsoft Word with a little creative flare! The cute striped straws, simillar to these from TomKat Studio, added the final touch. I hope this gives you some inspiration for your next party!  For my oldest daughter, Hayden's, 1st birthday I decided to do something involving the cute little animals she so loved! After looking up ideas on google, I decided to go with a jungle safari theme in soft colors. This was the first big party I got to plan since my wedding a few years earlier so I had lots of built up creative energy! Once I had a theme in mind I went to work on finding the perfect invitation. I found this one on zazzle and from that I built my color scheme. Zazzle is a great site because it's not as expensive as some of the others and the quality is just as great. You still get to customize the wording and add photos if you choose. From there I continued adding ideas and printing out photos of things that I wanted to try (a practice I swear by!). One of the best sites I found that gave me a ton of inspiration was greygreydesigns. She had a jungle theme that I pulled a lot of DIY ideas from! 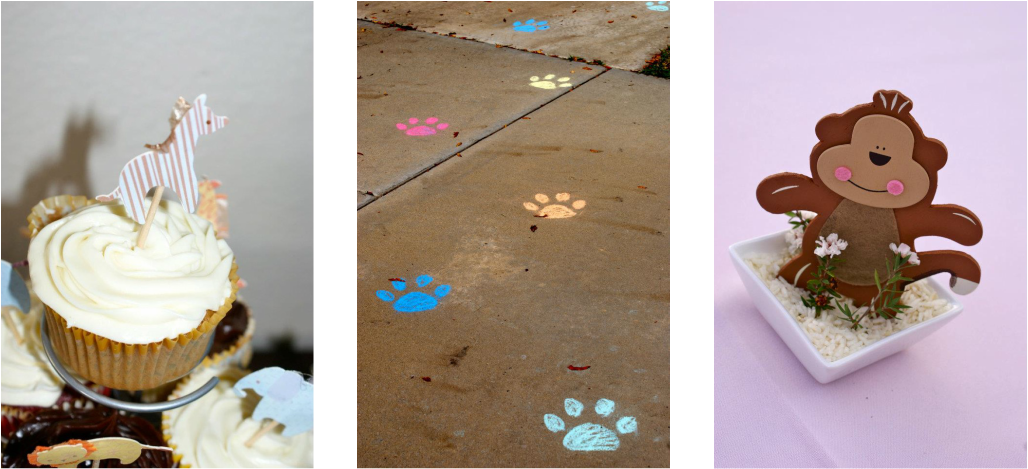 From left to right: I found these adorable animal parade cupcake toppers from Meri Meri. $12.95 for 24 toppers and 24 fun cupcake wrappers! There are 4 animals in the set, 6 each of the zebra, giraffe, elephant and lion. For the paw prints chalked on the driveway, I just found an animal paw picture on the internet and printed it out on sturdy card stock. Then I used an x acto knife to cut the paw out and made it into a stencil. I placed the stencil on different spots on our driveway and front walk and colored them in with chalk! It was so easy and made such a cute introduction for our guests! The small wooden animals I found from Hobby Lobby. I bought the monkey, zebra, giraffe and tiger (the giraffe was my favorite!). I got the "Jungle Juice" idea from greygreydesigns as well, a mix of gingerale and pineapple juice. To add a touch of fancy I put it in a glass drink dispenser I bought from Bed, Bath and Beyond, similar to this one. 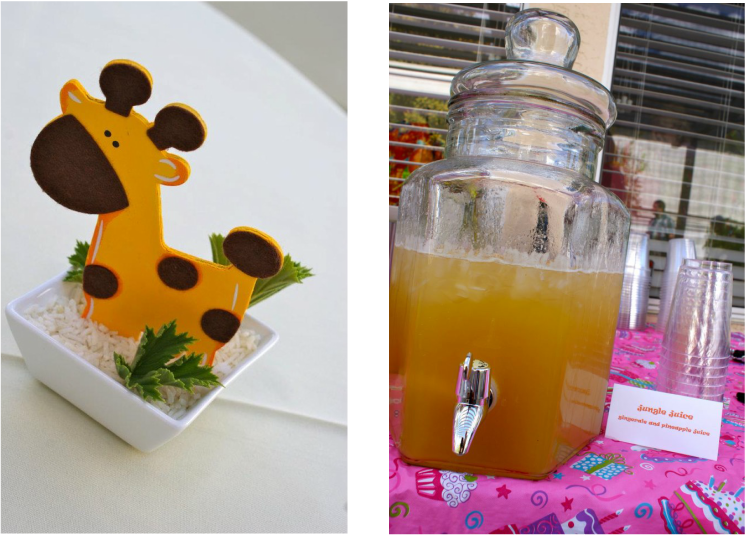 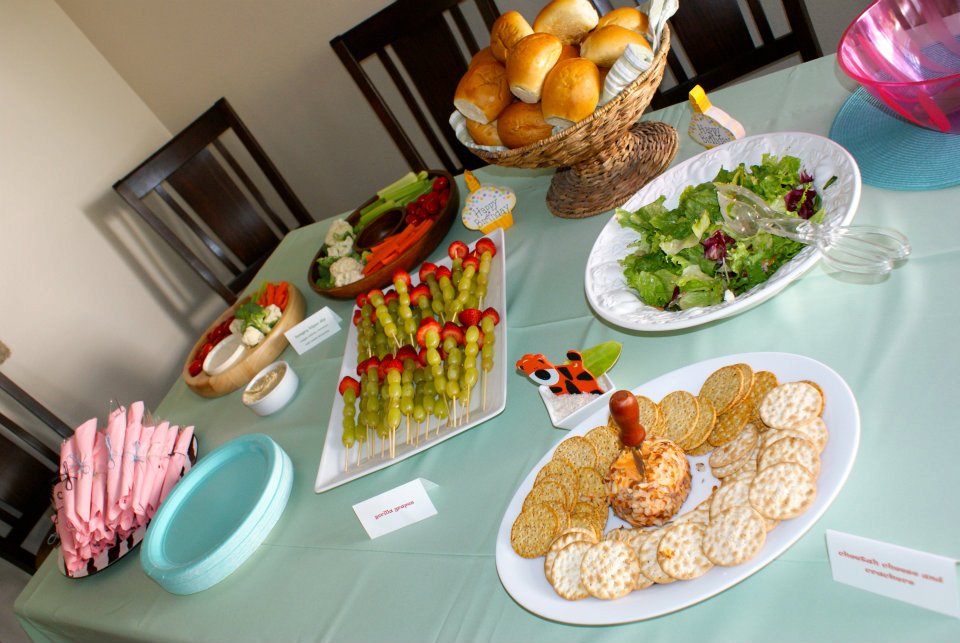 Now for one of the best parts of any party: The Food! I found a lot of great food ideas, many of which I borrowed from greygreydesigns (they were my biggest inspiration!). We had "Hungry Hippo Dip" which was a mix of veggies and both ranch and humus dip, "Cheetah Cheese and Crackers", and "Gorilla Grapes" which were skewers of grapes and topped with a strawberry. I cut the top of the strawberries off to make it easier to eat, I always hate when I go to eat a strawberry at a party and I have to leave a chunk of leaf on my plate! We also had our favorite Italian restaurant deliver different pasta dishes so I had yummy salad and rolls on the table. 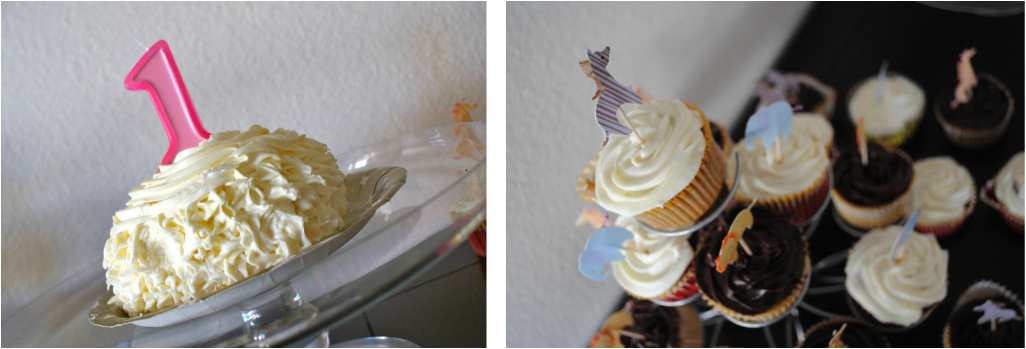 For Hayden's smash cake my wonderful sister-in-law, Chelsea, baked a vanilla cake with cream cheese frosting and also made vanilla and chocolate cupcakes! It was a yummy way to end a perfect day! Thanks for checking out my Jungle Party and I hope it gave you some fun ideas!  |

Hello and Welcome! My name is Devon and I'm so glad you've stopped by! I'm slightly OCD and with that comes my joy (and need!) to create the perfect celebration. Join me as I find great deals, create DIY decor and reveal the most unique parties around. I hope you find some great inspiration for your next event!
Archives
March 2015
Categories |
