

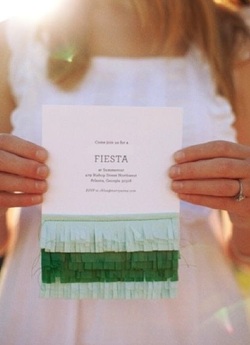
This sweet and simple Fiesta invitation is from Nomad Luxuries. Start by typing your invitation in Microsoft Word, or any software of your choice, and print them out on simple white card stock (make sure you leave enough room at the bottom for the fringe!) For the fringe, use different colored streamers and cut them to the length you need. Cut up each streamer about halfway so it creates several small ruffles. Once your invitations are printed and cut to size, attach the streamers with glue or double sided tape, starting from the bottom and overlapping each piece. So easy!
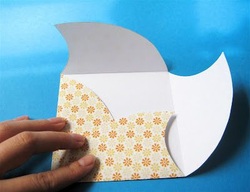
I'm in LOVE with these invitations! I'm in the middle of making them for Brooklyn's 2nd birthday as I write this! I found this amazing idea from i felt fuzzy. The full tutorial is on their website so I won't go into it in too much detail, but you definitely have to check it out! Once I have all of my invitations folded I'm going to glue the wording that I created in Microsoft Word in the 4x4 window in the middle. Instead of putting these into envelopes, I'm going to attach the stamp right to the front and mail them as-is!

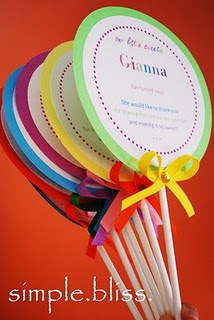
These lollipop invites just make you smile! I found these on One Simple Bliss. For these you'll need lollipop sticks (you can find these at any craft store), colored and plain white card stock, and ribbon. Again using my favorite Microsoft Word, create a circle shape in the size you want, add a text box, and customize the wording and colors to match your theme. I love how she did a variety of colors, but to save on the amount of ribbon and card stock you need to buy, you could just pick one or two. Next print the circles on white card stock and cut them out. Then cut out circles an inch or so larger from the colored card stock. Attach the white circle to one of the colored with glue or double sided tape. Take one of your lollipop sticks and tape it to the back of the invite, add a small piece of ribbon and you're ready to give people a sneak peek of how cute your party will be!

These castle invites are adorable with a draw bridge that opens to reveal your party information! The free template is available from Make Your Own Invitations. Check out their website for detailed instructions as well as other free template ideas!
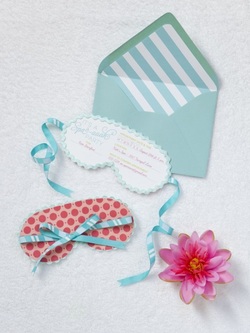
I love these for a Spa Party or any kind of girly event! These will take a little extra work but the final product will be worth it! There were no instructions for these so this is just how I would do it. Type up your invitation wording in your preferred software program, keeping in mind you'll be cutting them rather small. Hand draw your mask on card stock (it may take a few tries before its perfect!) and cut it out for your template. Print out your invites on white card stock and use your template to cut each one into a mask. Using two sided scrapbook paper, cut your outer layer slightly bigger so it shows behind your mask. I love the colors she used, but there are so many choices out there! Take two pieces of ribbon and attach them to the back of your white card stock on the outer edges with tape or a dot of glue. Now take your colored scrapbook paper and use double sided tape or glue to attach it to your white card stock. Almost done! Tie the two ends of your ribbon together at the back, to have it lay flat you can add a drop of glue or a glue dot to the back of the bow and secure it to the paper. Next, buy a set of pretty envelopes, tuck them inside and mail!

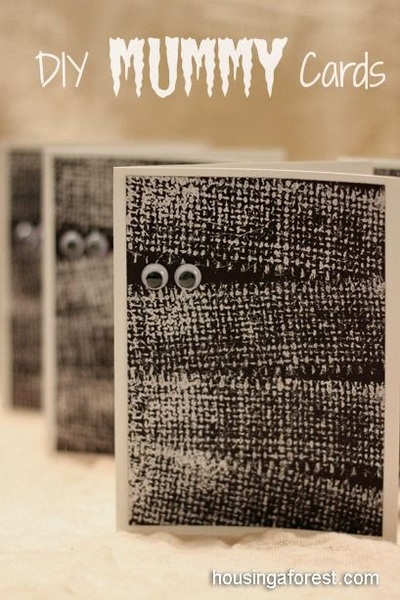
Now I know we're a ways out, but how cute are these Halloween party invites! Pin them now and use them in October! I found these on Housing A Forest and they are absolutely adorable and so easy to make! She has the full tutorial on her website so I'll just list the short version. She created a stamp for the mummy gauze by attaching a strip of burlap to a thick piece of styrofoam, you could use any raised object that can be cut to the correct size. She attached a piece of black paper to a simple white card and stamped the burlap using white paint. Make sure you leave a small v of black paper showing and attach two googly eyes!
I hope these invites gave you some good ideas for your next event! Happy Planning!